In this article we look at defect location identification to ensure you add your damage in the correct location.
PRRS Inspection Report
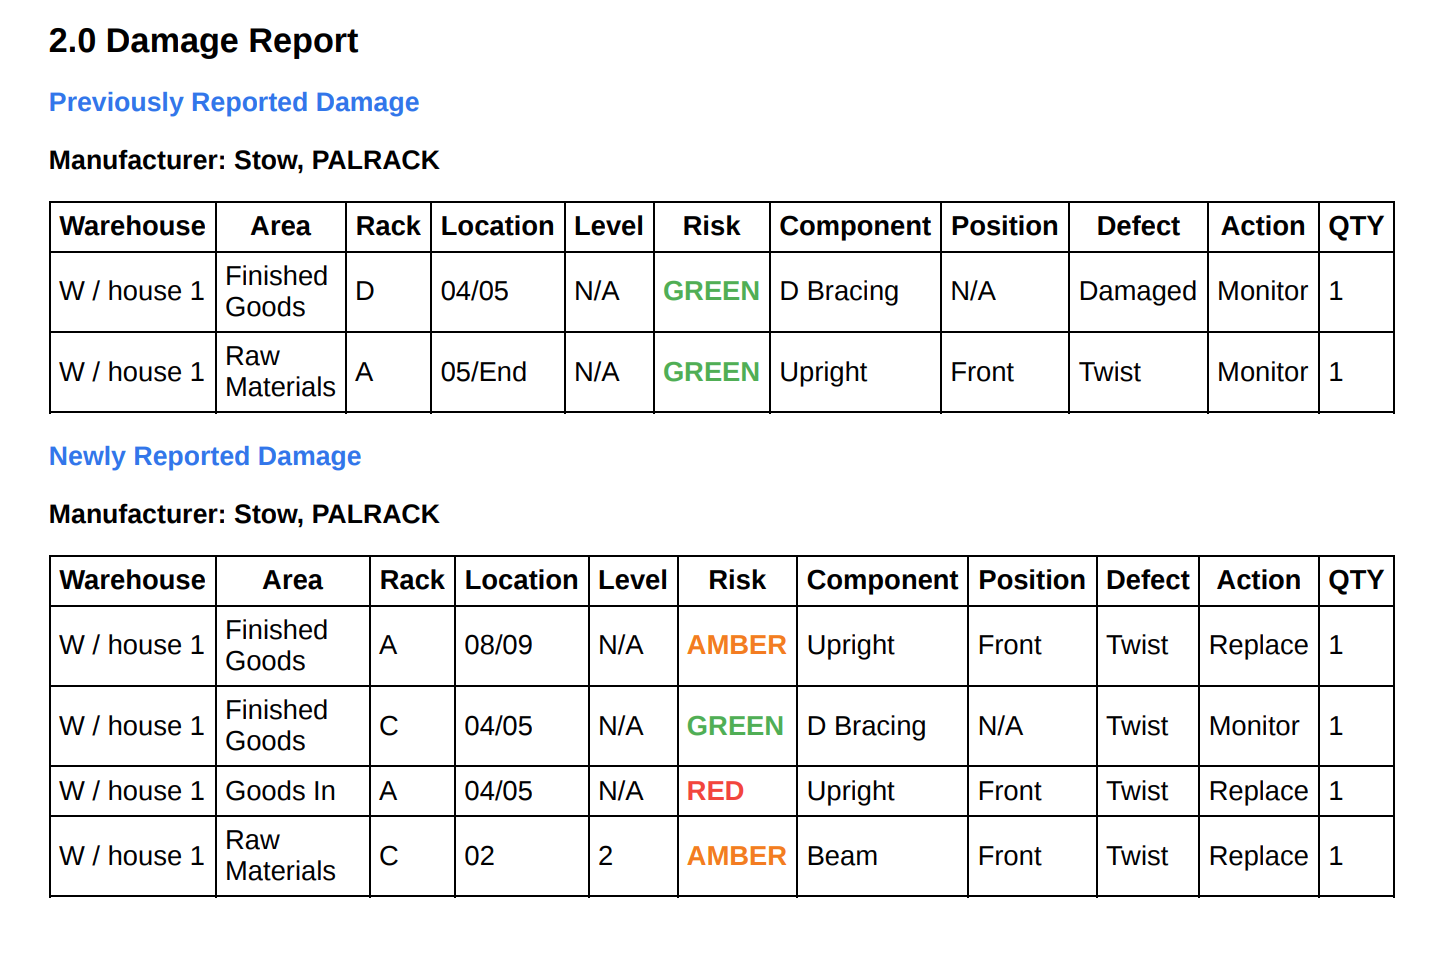
After completing an inspection, you are able to export the report to a pdf format. The Econform PRRS report will detail the damage added during your inspection along with the bill of materials of the damaged components if any Amber or Red risk damage has been added during your inspection. If there was damage added in a previous inspection, this damage will be detailed under the "Previously Added Damage" heading of the report.
Defect Damage Location
It is essential that defects are recorded accurately and the inspector records the correct component and position within the damaged rack. Without accurate defect locations, it is difficult to complete a controlled offload of the affected locations for the remedial works to be carried out.
When carrying out the initial site set up, the Econform app builds a representation of your site, detailing the Racks within a specific Area of specific Warehouse within the site. This detail is reflected in the Damage Report section of the report which details the location of the added damage along with the damaged component type.
Orientation of Rack
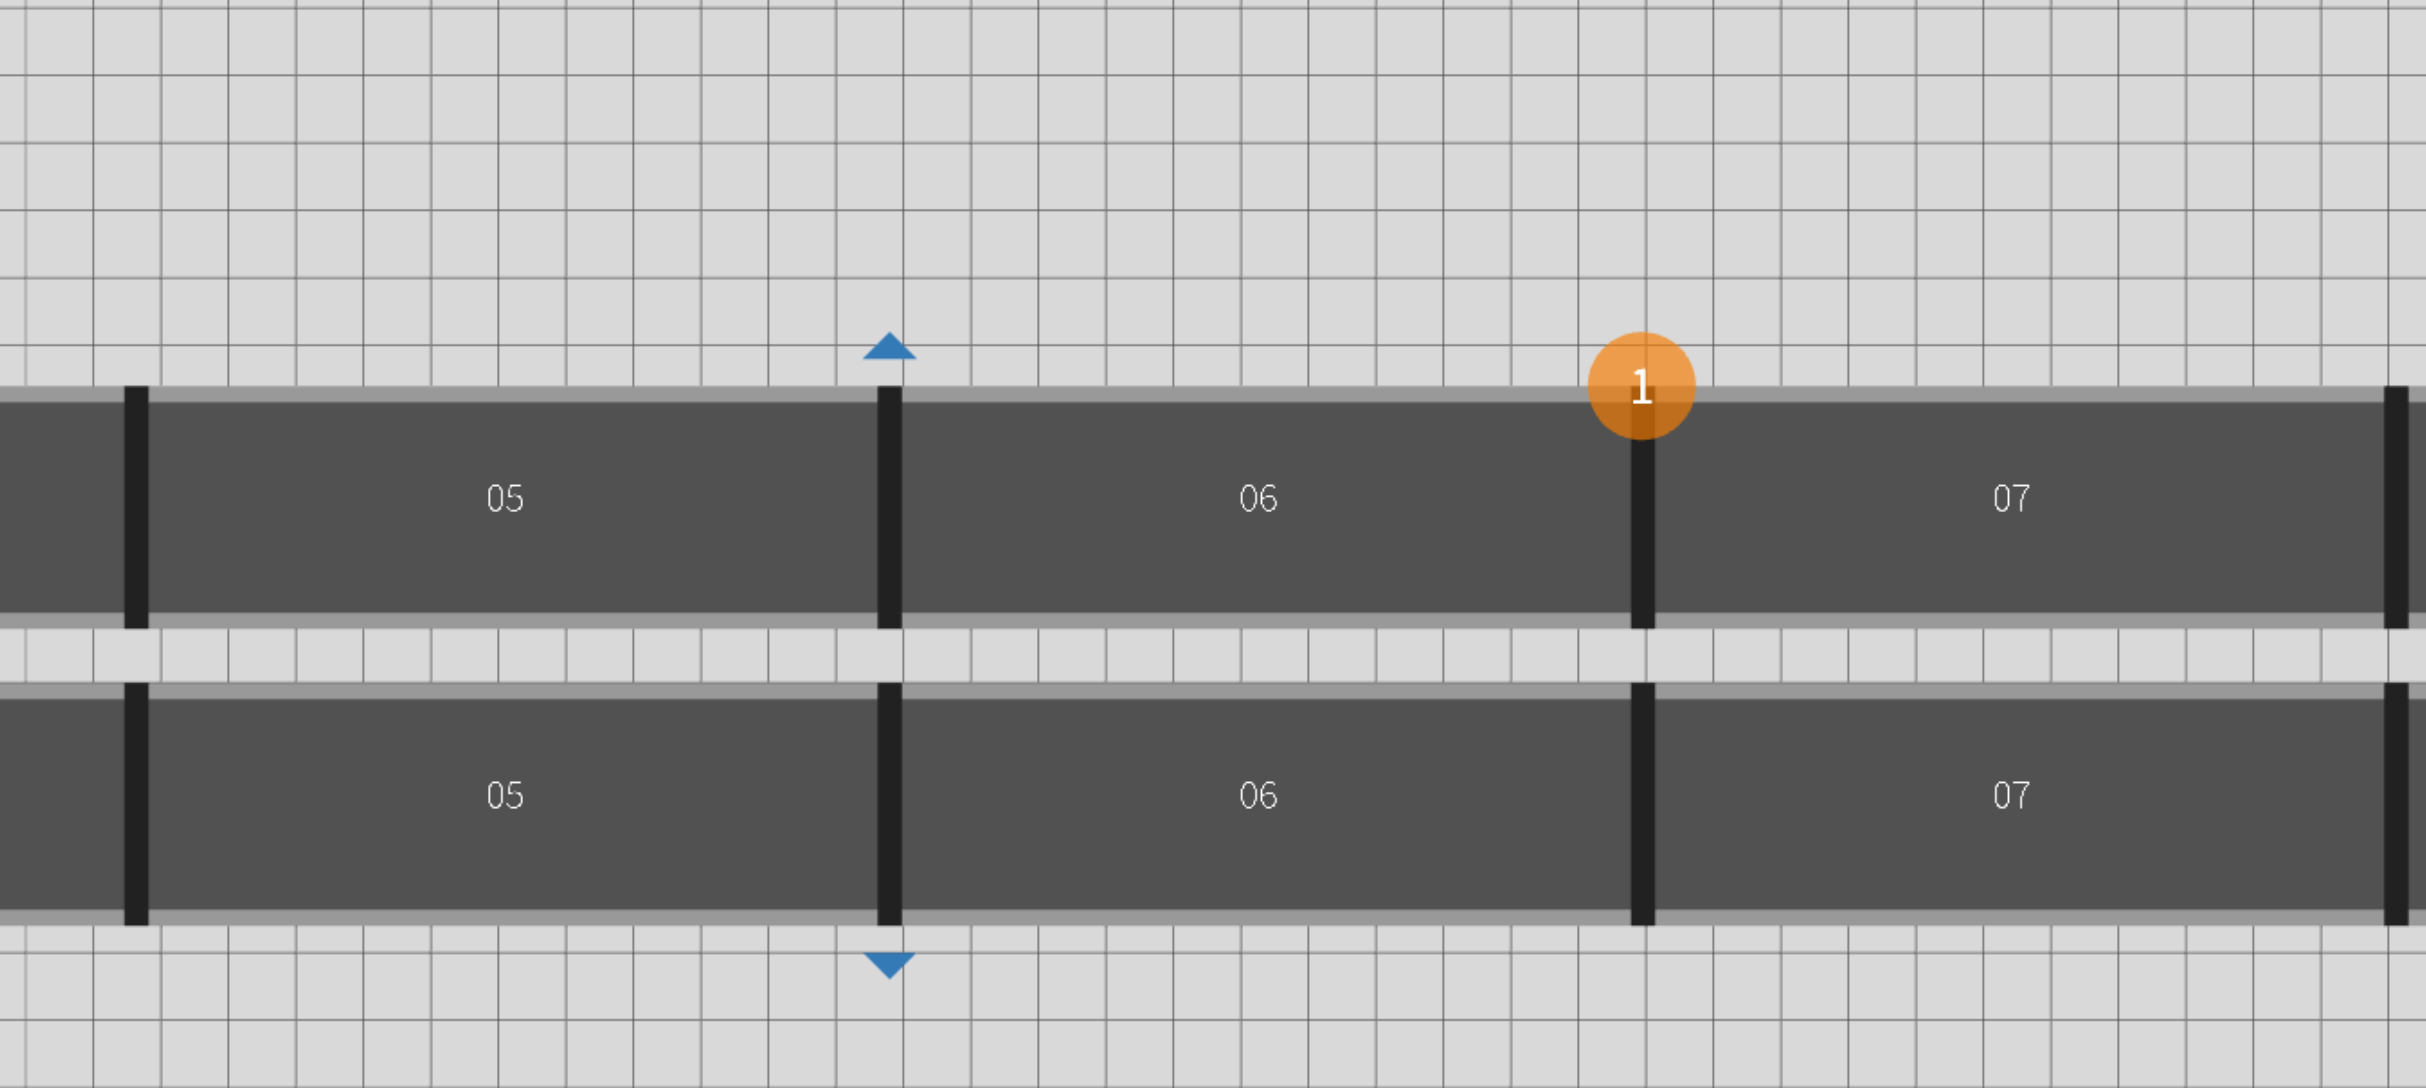
On the blueprint, each rack details its orientation with a Triangle which is where you will be standing when carrying out your inspection. This is to ensure that when adding damage, say an upright damage, that you choose the correct position, whether that be Front or Rear.
When adding damage to a rack on the Econform app, a damage indicator is added to the warehouse blueprint indicating the exact position on the damage within the rack. By tapping on the damage indicator, this will bring up the details of the damage, who and when it was added along with the specification of the damage component.
In the example below, Amber Risk damage has been added to the front upright, location 06/07.
Arrangement of Rack
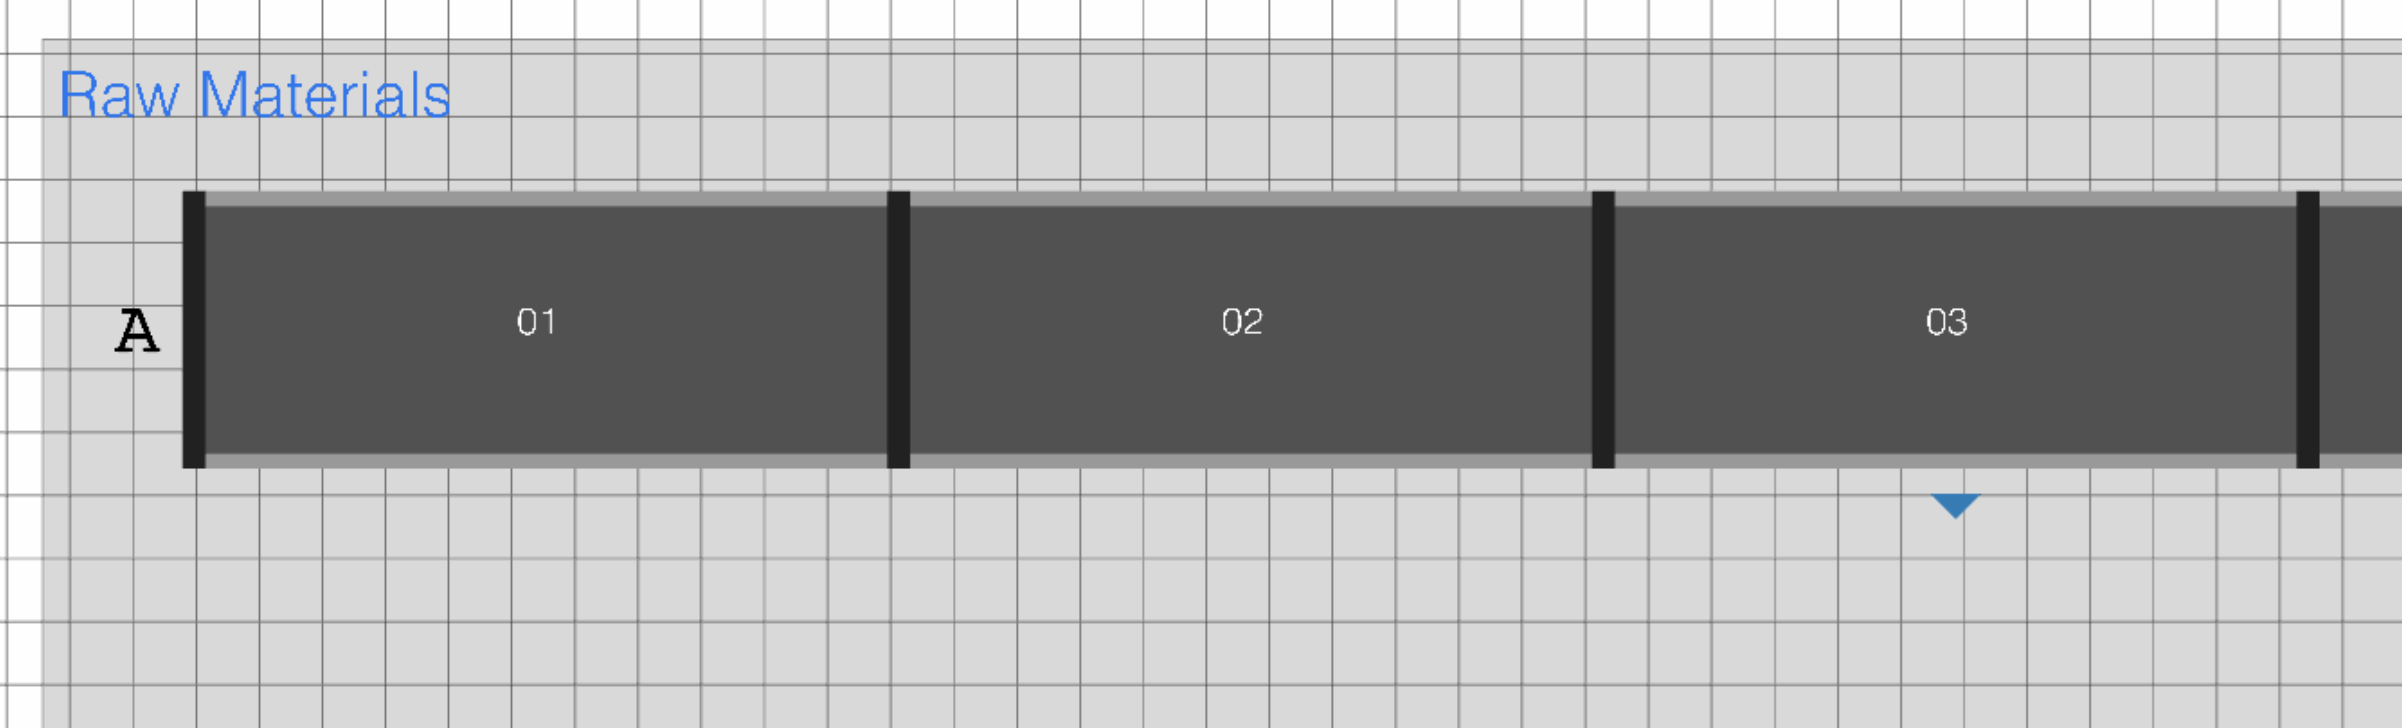
On the blueprint, each racking bay is identified with a number. A rack can have the bay numbers running from Left to Right (01, 02, 03, 04...) or Right to Left (...04, 03, 02, 01). It essential when adding damage that you are aware of the arrangement of the rack to ensure that you add the damage in the correct location. You can do this by going into the blueprint and checking the arrangement of the rack.
In the example below, Rack A is running in the Left to Right arrangement.
Example Upright Damage
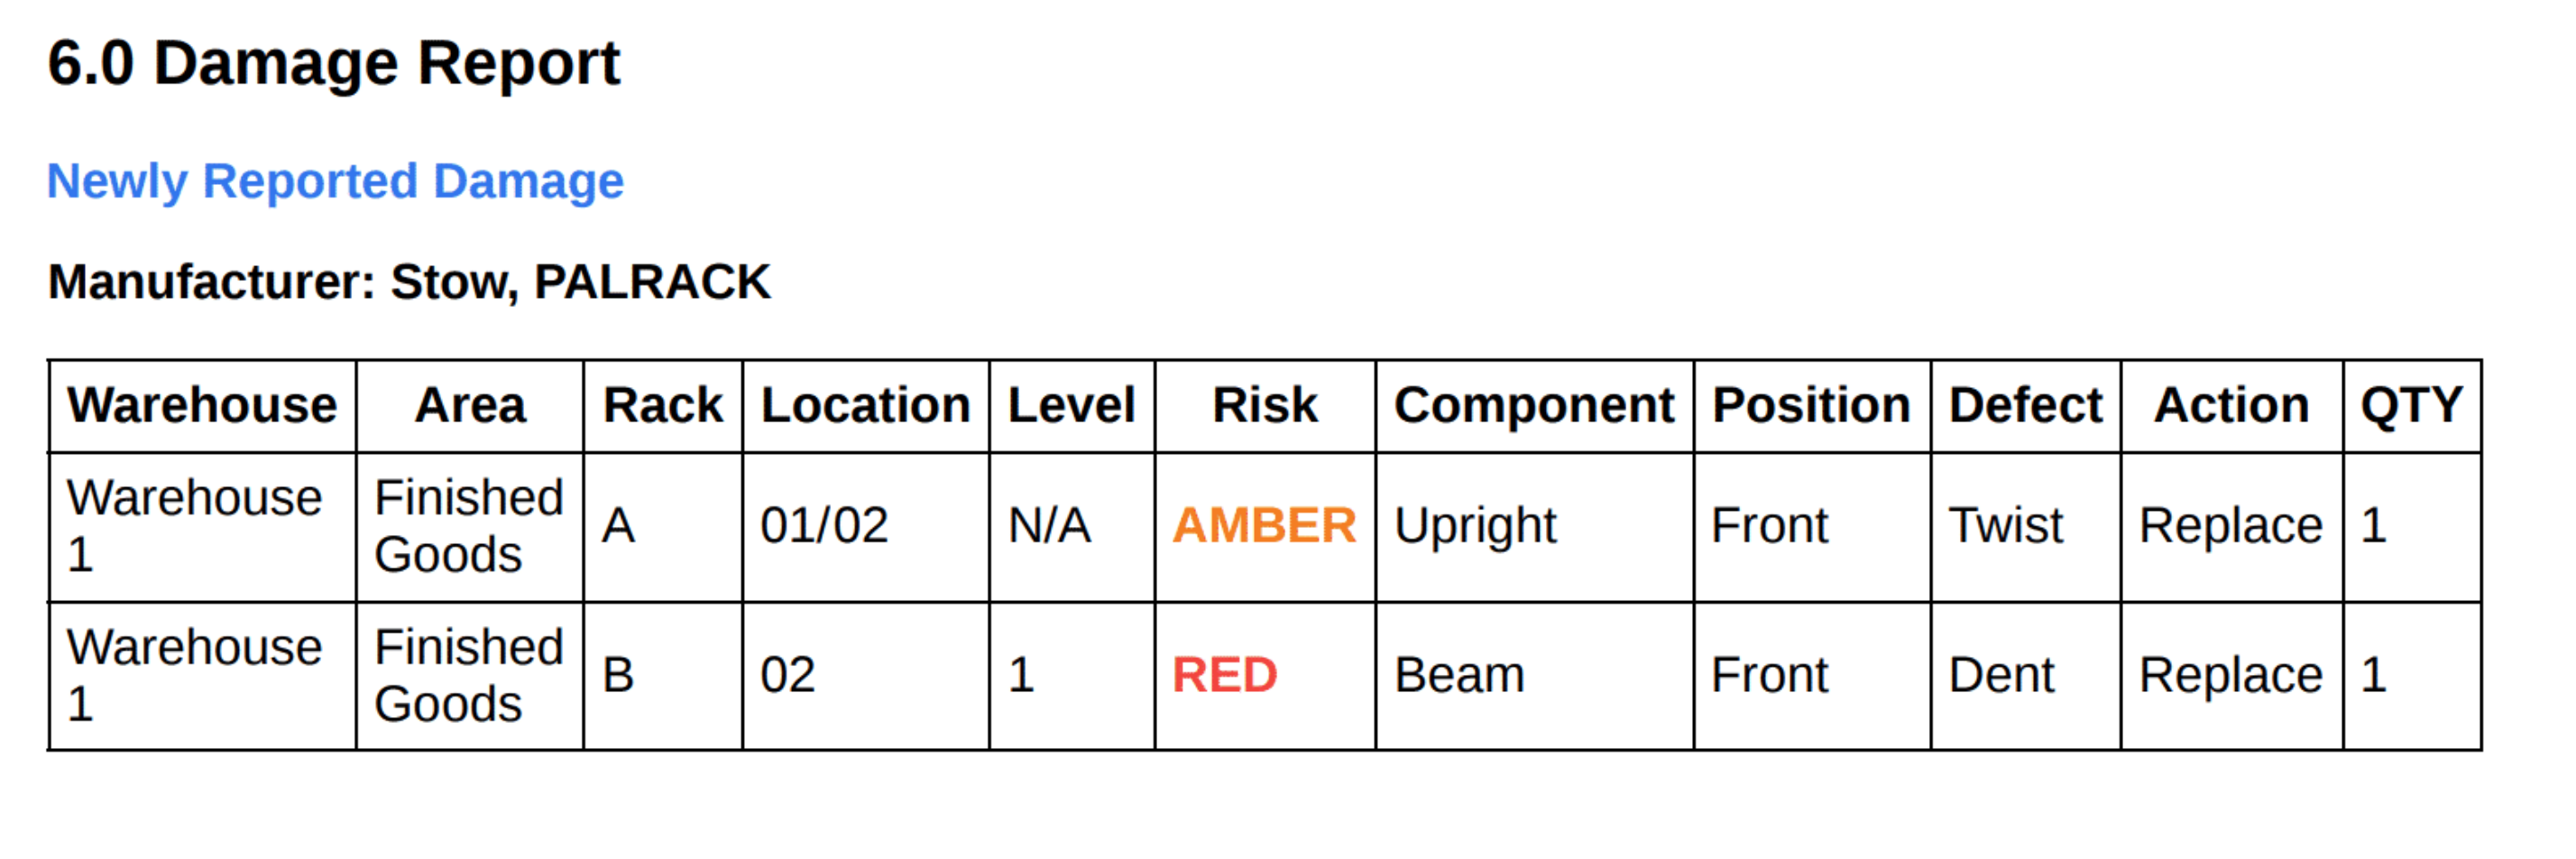
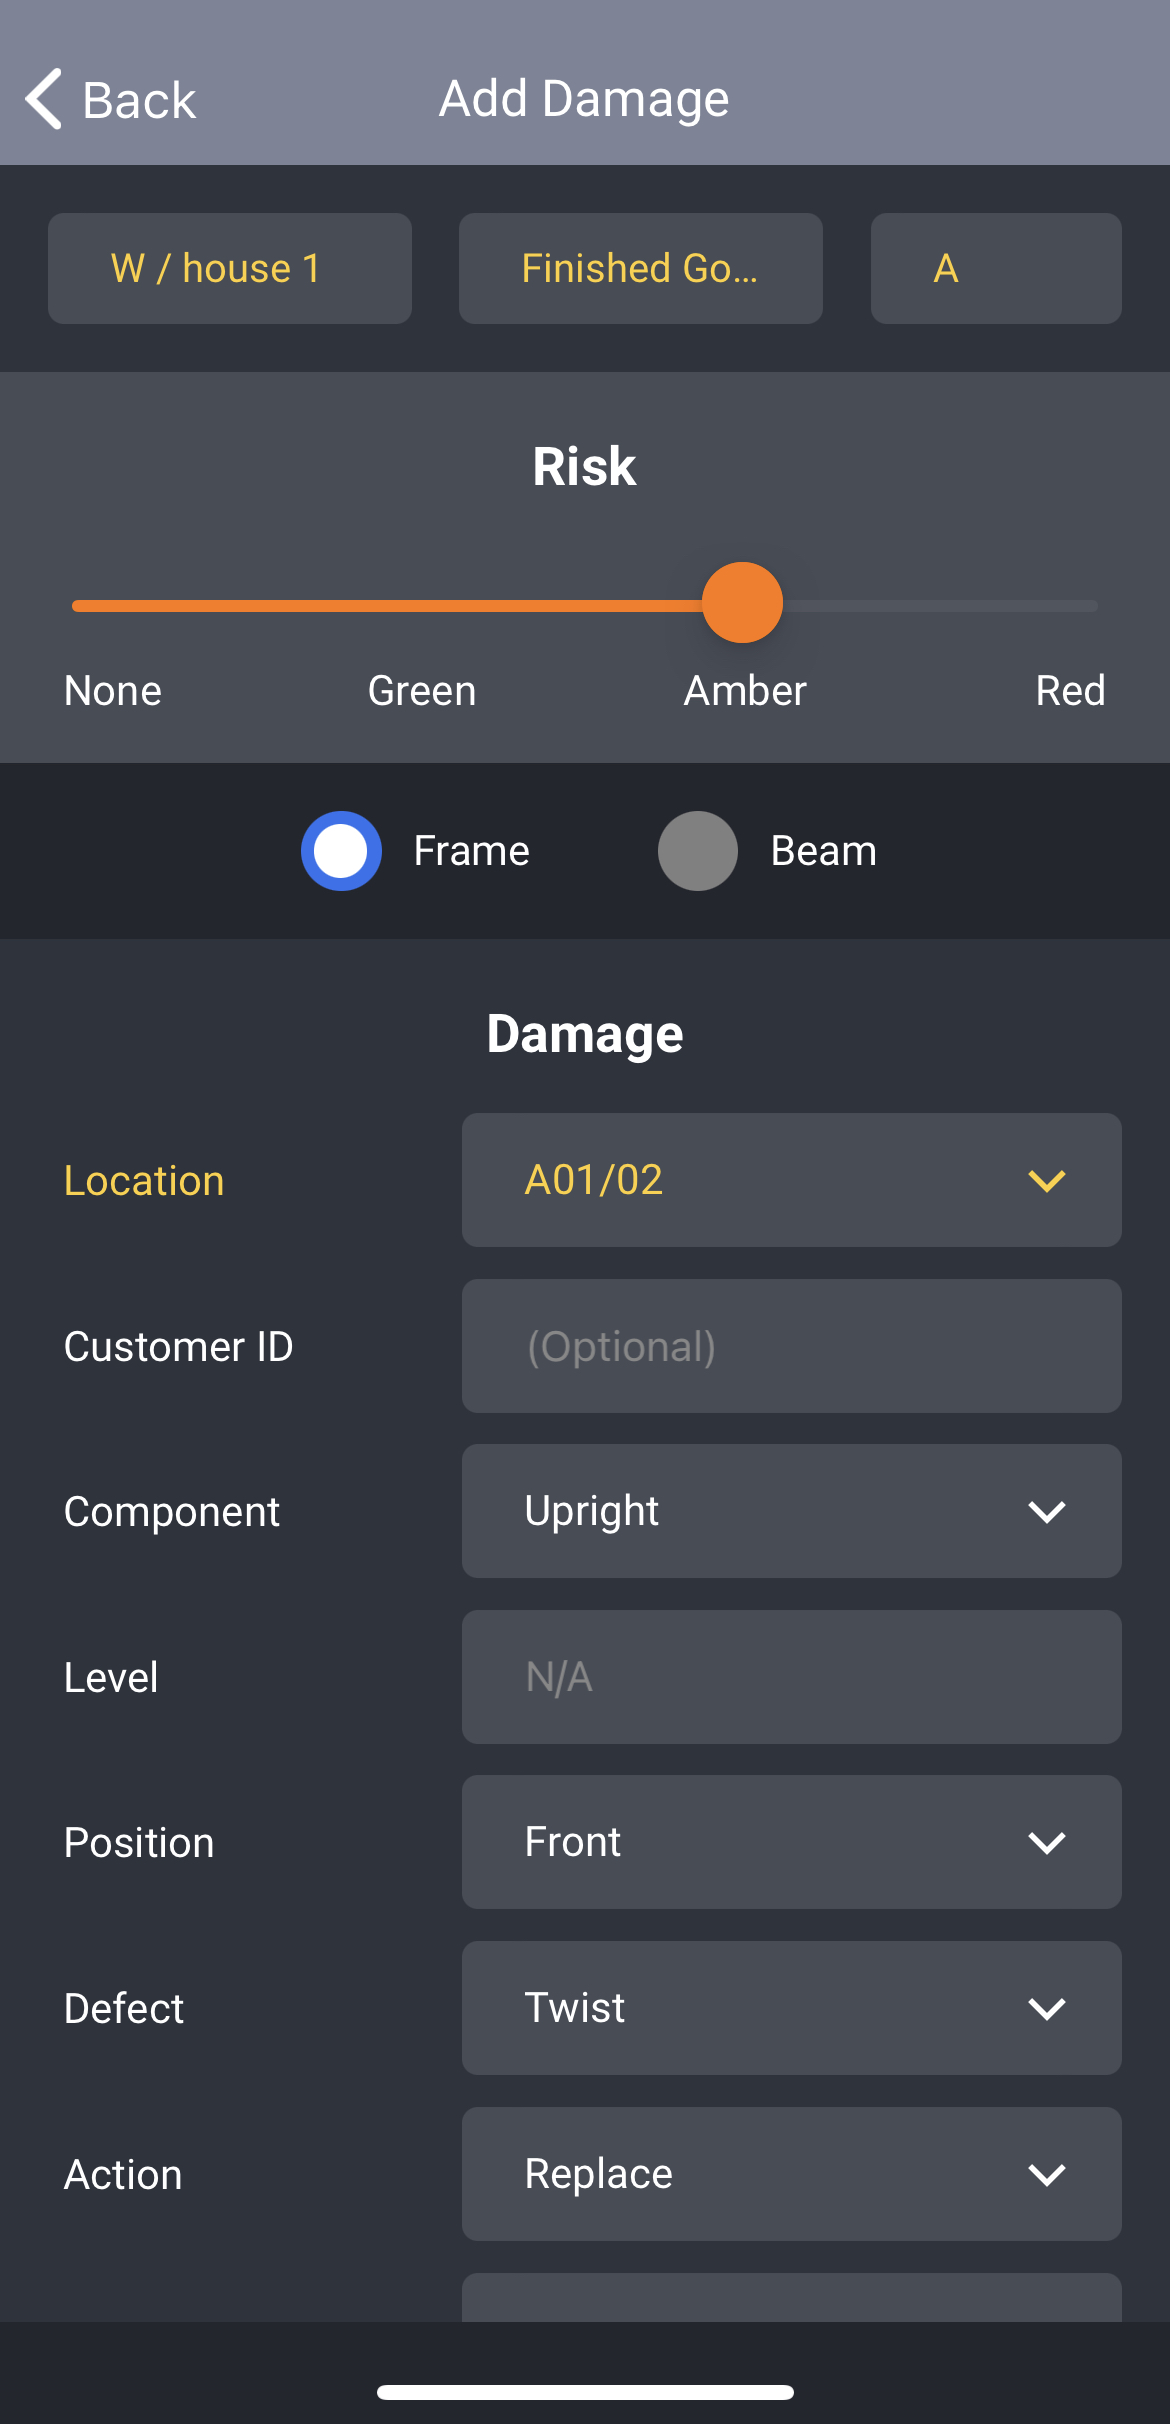
Amber Risk upright damage has been added to Rack A, location 01/02 (Front) with Rack A assigned to the Finished Goods area of Warehouse 1.
Lets take a look what this would look like on the Add Damage screen of the mobile app.
Example Beam Damage
Red Risk beam damage has been added to Rack B, location 02 (Front) with Rack B assigned to the Finished Goods area of Warehouse 1.
Lets take a look what this would look like on the Add Damage screen of the mobile app.

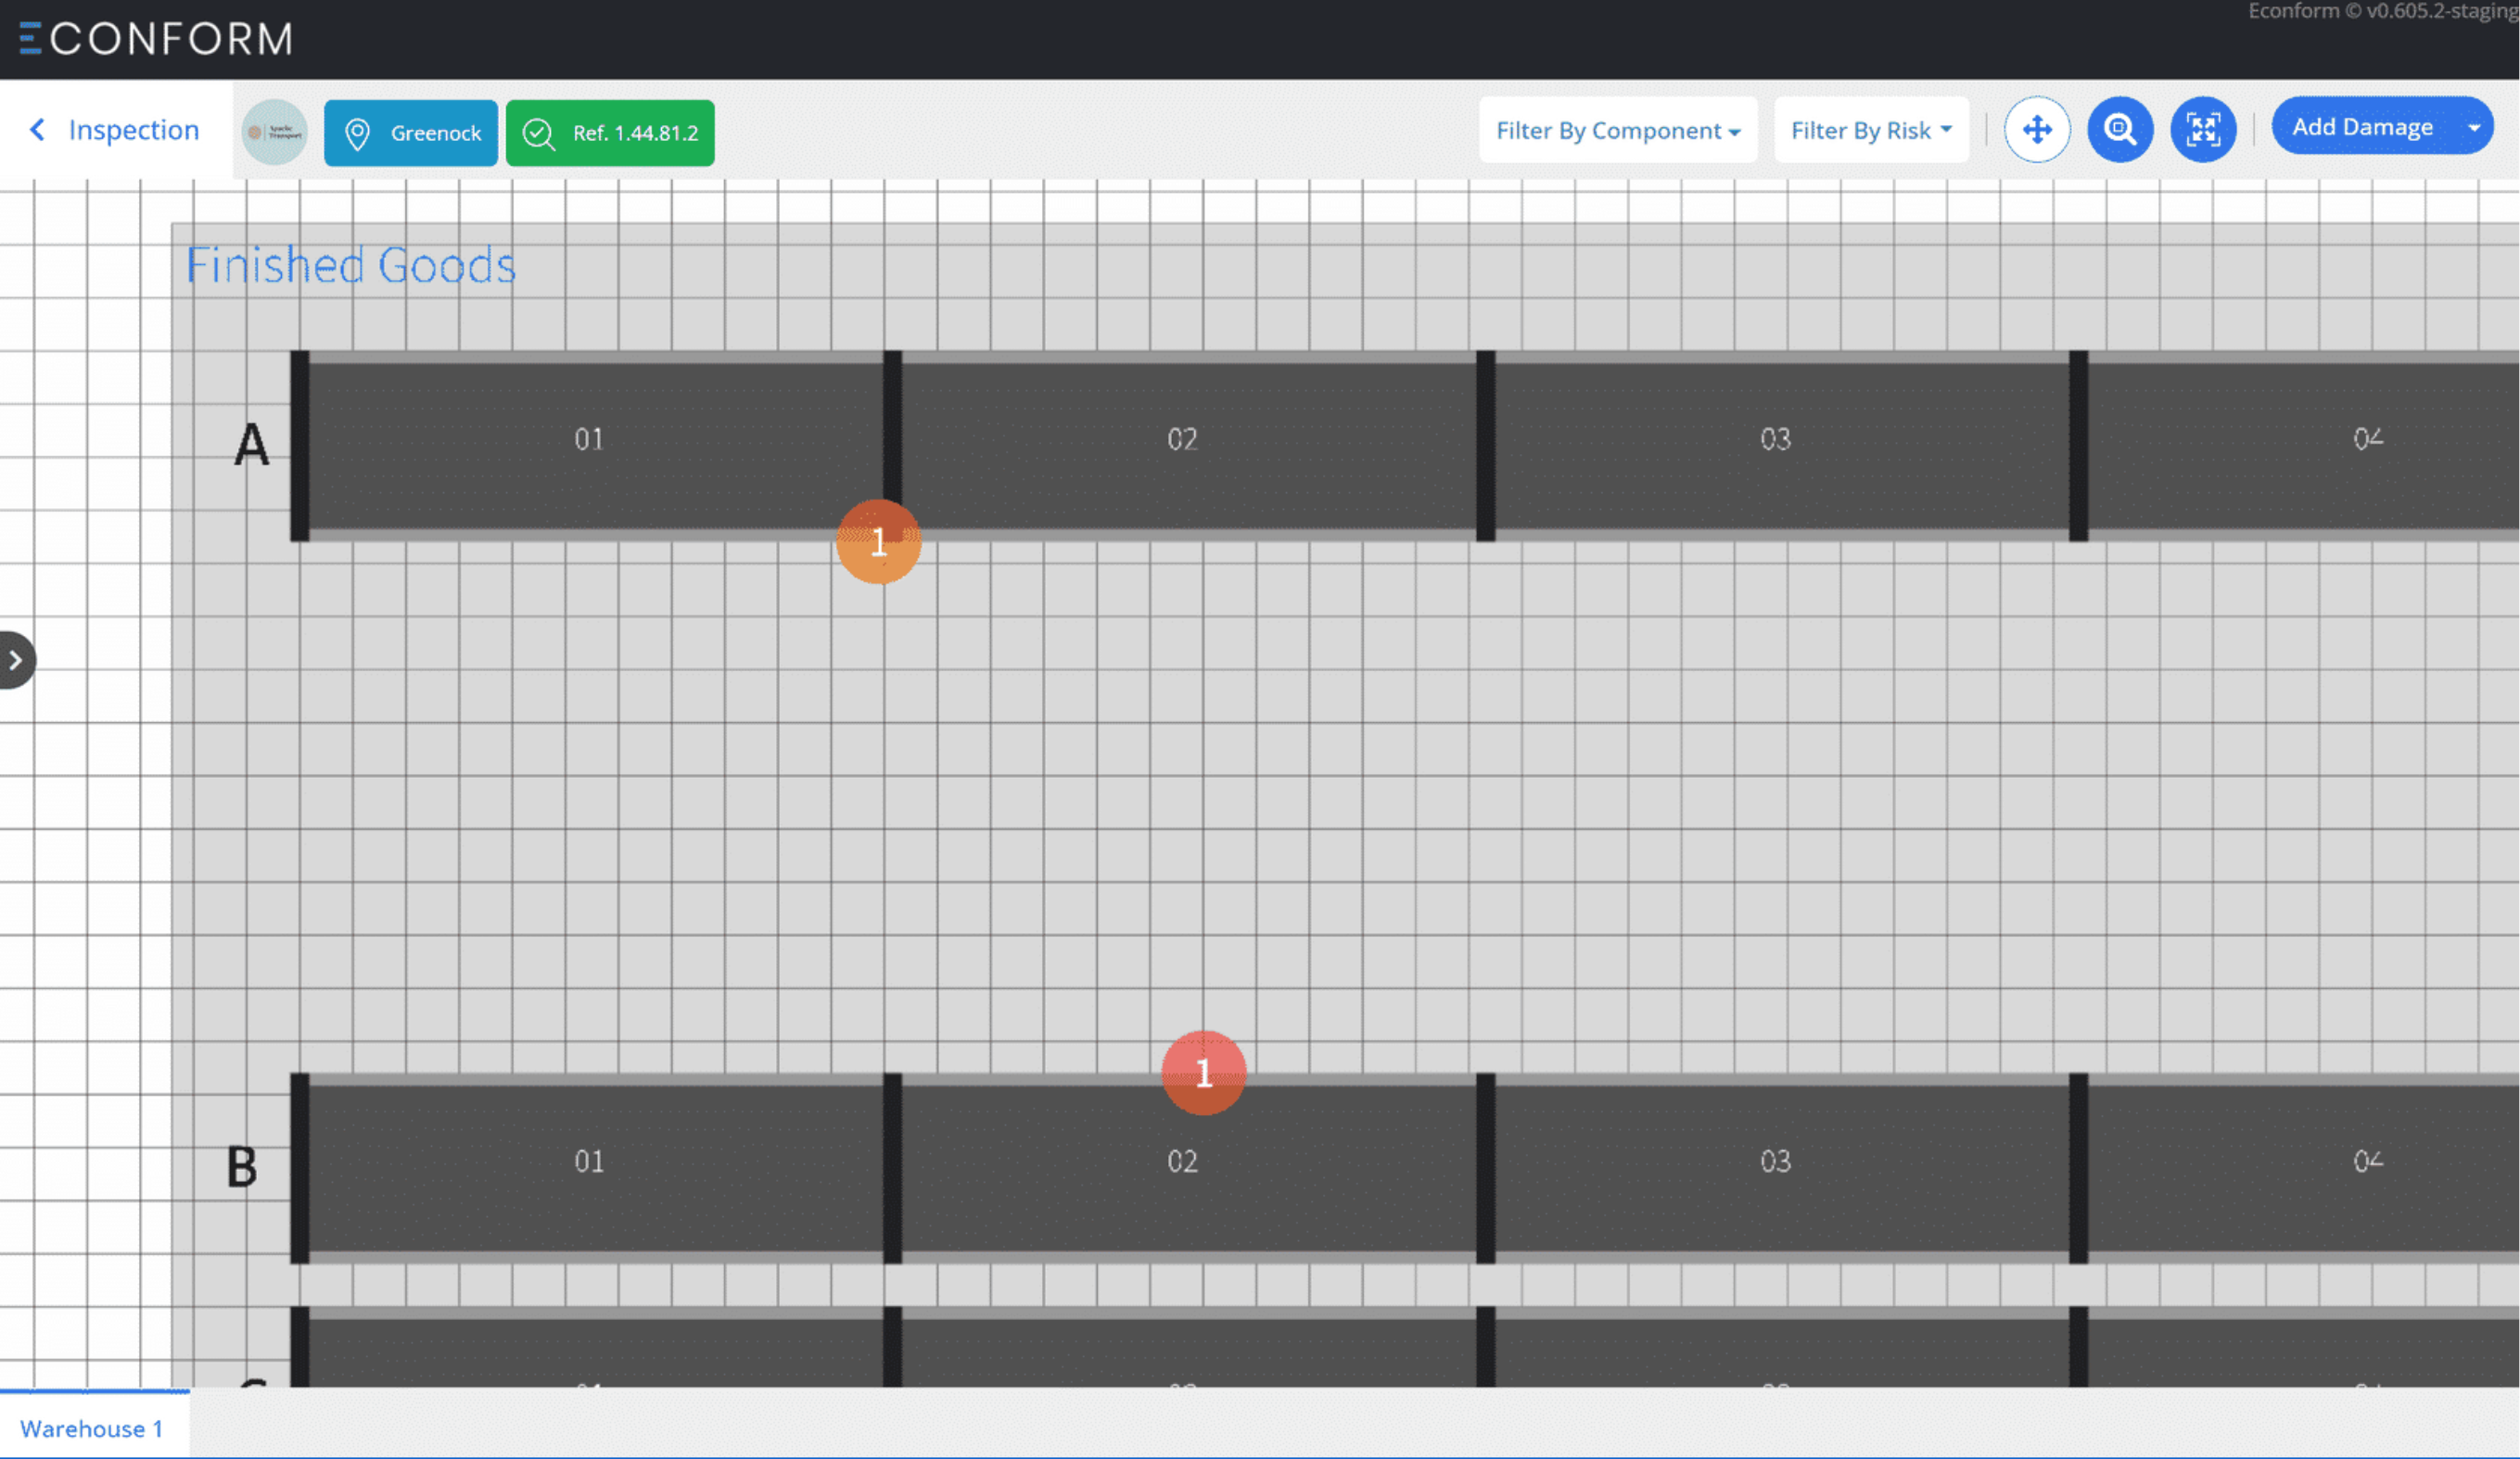
Lets now take a look at the blueprint and see where the damage indicators for both upright and beam damage has been added to on Rack A and Rack B.
Damage Report
Now, lets take a look at the Damage Report table within the inspection report which details the location of the added damage along with the damaged component types.